Dynamics 365 Business Central: Conditional Visibility for Tables in Word Layouts
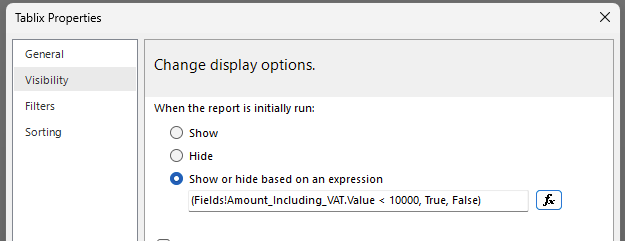
RDLC makes conditional visibility easy — set an expression on the Visibility property, and the element hides itself when the condition isn’t met.
Word layouts don’t have this option out of the box.
In this post, I’ll show you how to mimic that same behaviour in Word layout using AL code.
1. Table Hidden vs Visible in Word Layout
Here’s a real example.
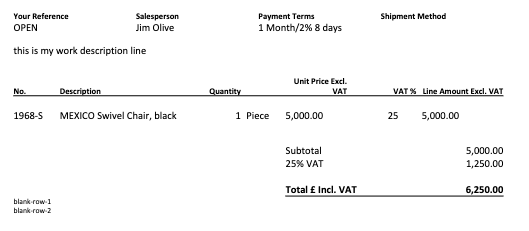
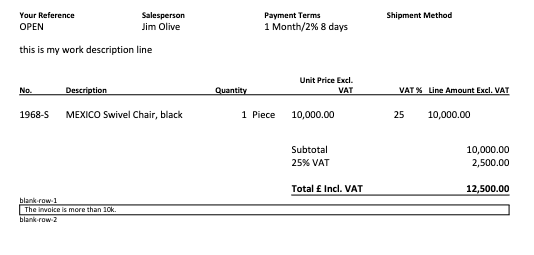
The condition: if the invoice amount is more than 10,000, show a the table. If not, hide it.
As shown, when the table is hidden, it does not take up any extra space.
2. How It Works: Hide Table in Word Layout
2.1 Create a new Dataitem
dataitem("My Table"; "Integer")
{
    DataItemTableView = sorting(Number) where(Number = const(1));

    column(MyTableVisibility; MyTableVisibility) { }

    trigger OnPreDataItem()
    begin
        Header.CalcFields("Amount Including VAT");
        if Header."Amount Including VAT" < 10000 then
            CurrReport.Break();
    end;
}
(a) We create a new DataItem using the Integer table, filtered to Number = 1. This makes sure the DataItem only runs once.
(b) A new column, MyTableVisibility, is added. This is the field we’ll insert into the Word layout to control the table.
(c) In the OnPreDataItem trigger, we add CurrReport.Break() with our condition — in this example, when Amount Including VAT is less than 10,000. This stops the DataItem from running, which means the column won’t return a value, and the table tied to it won’t show.
2.2 Insert a new Table in Word Layout

(a) Insert a new table into the layout.
(b) In the first row, insert the MyTableVisibility field.
(c) Add more rows below for your content — normal fields or even a repeating table both works. As long as they’re in the same table, they’ll follow MyTableVisibility: hidden when it’s hidden, shown when it’s visible.
(d) Add Repeating to the first row that contained MyTableVisibility field.
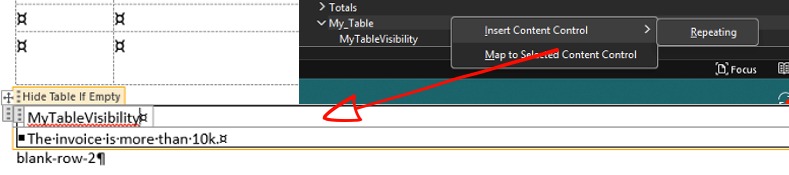
This step is important — without it, the visibility will not work.
(e) Wrap the table with Hide Table If Empty -> Hide Empty Table.